Pinspiration Monday: Dipped clay pots

The giveaway winner has been announced!!
Click here to see if you’ve won the prize pack from The Green Daisy or See Jane Work!

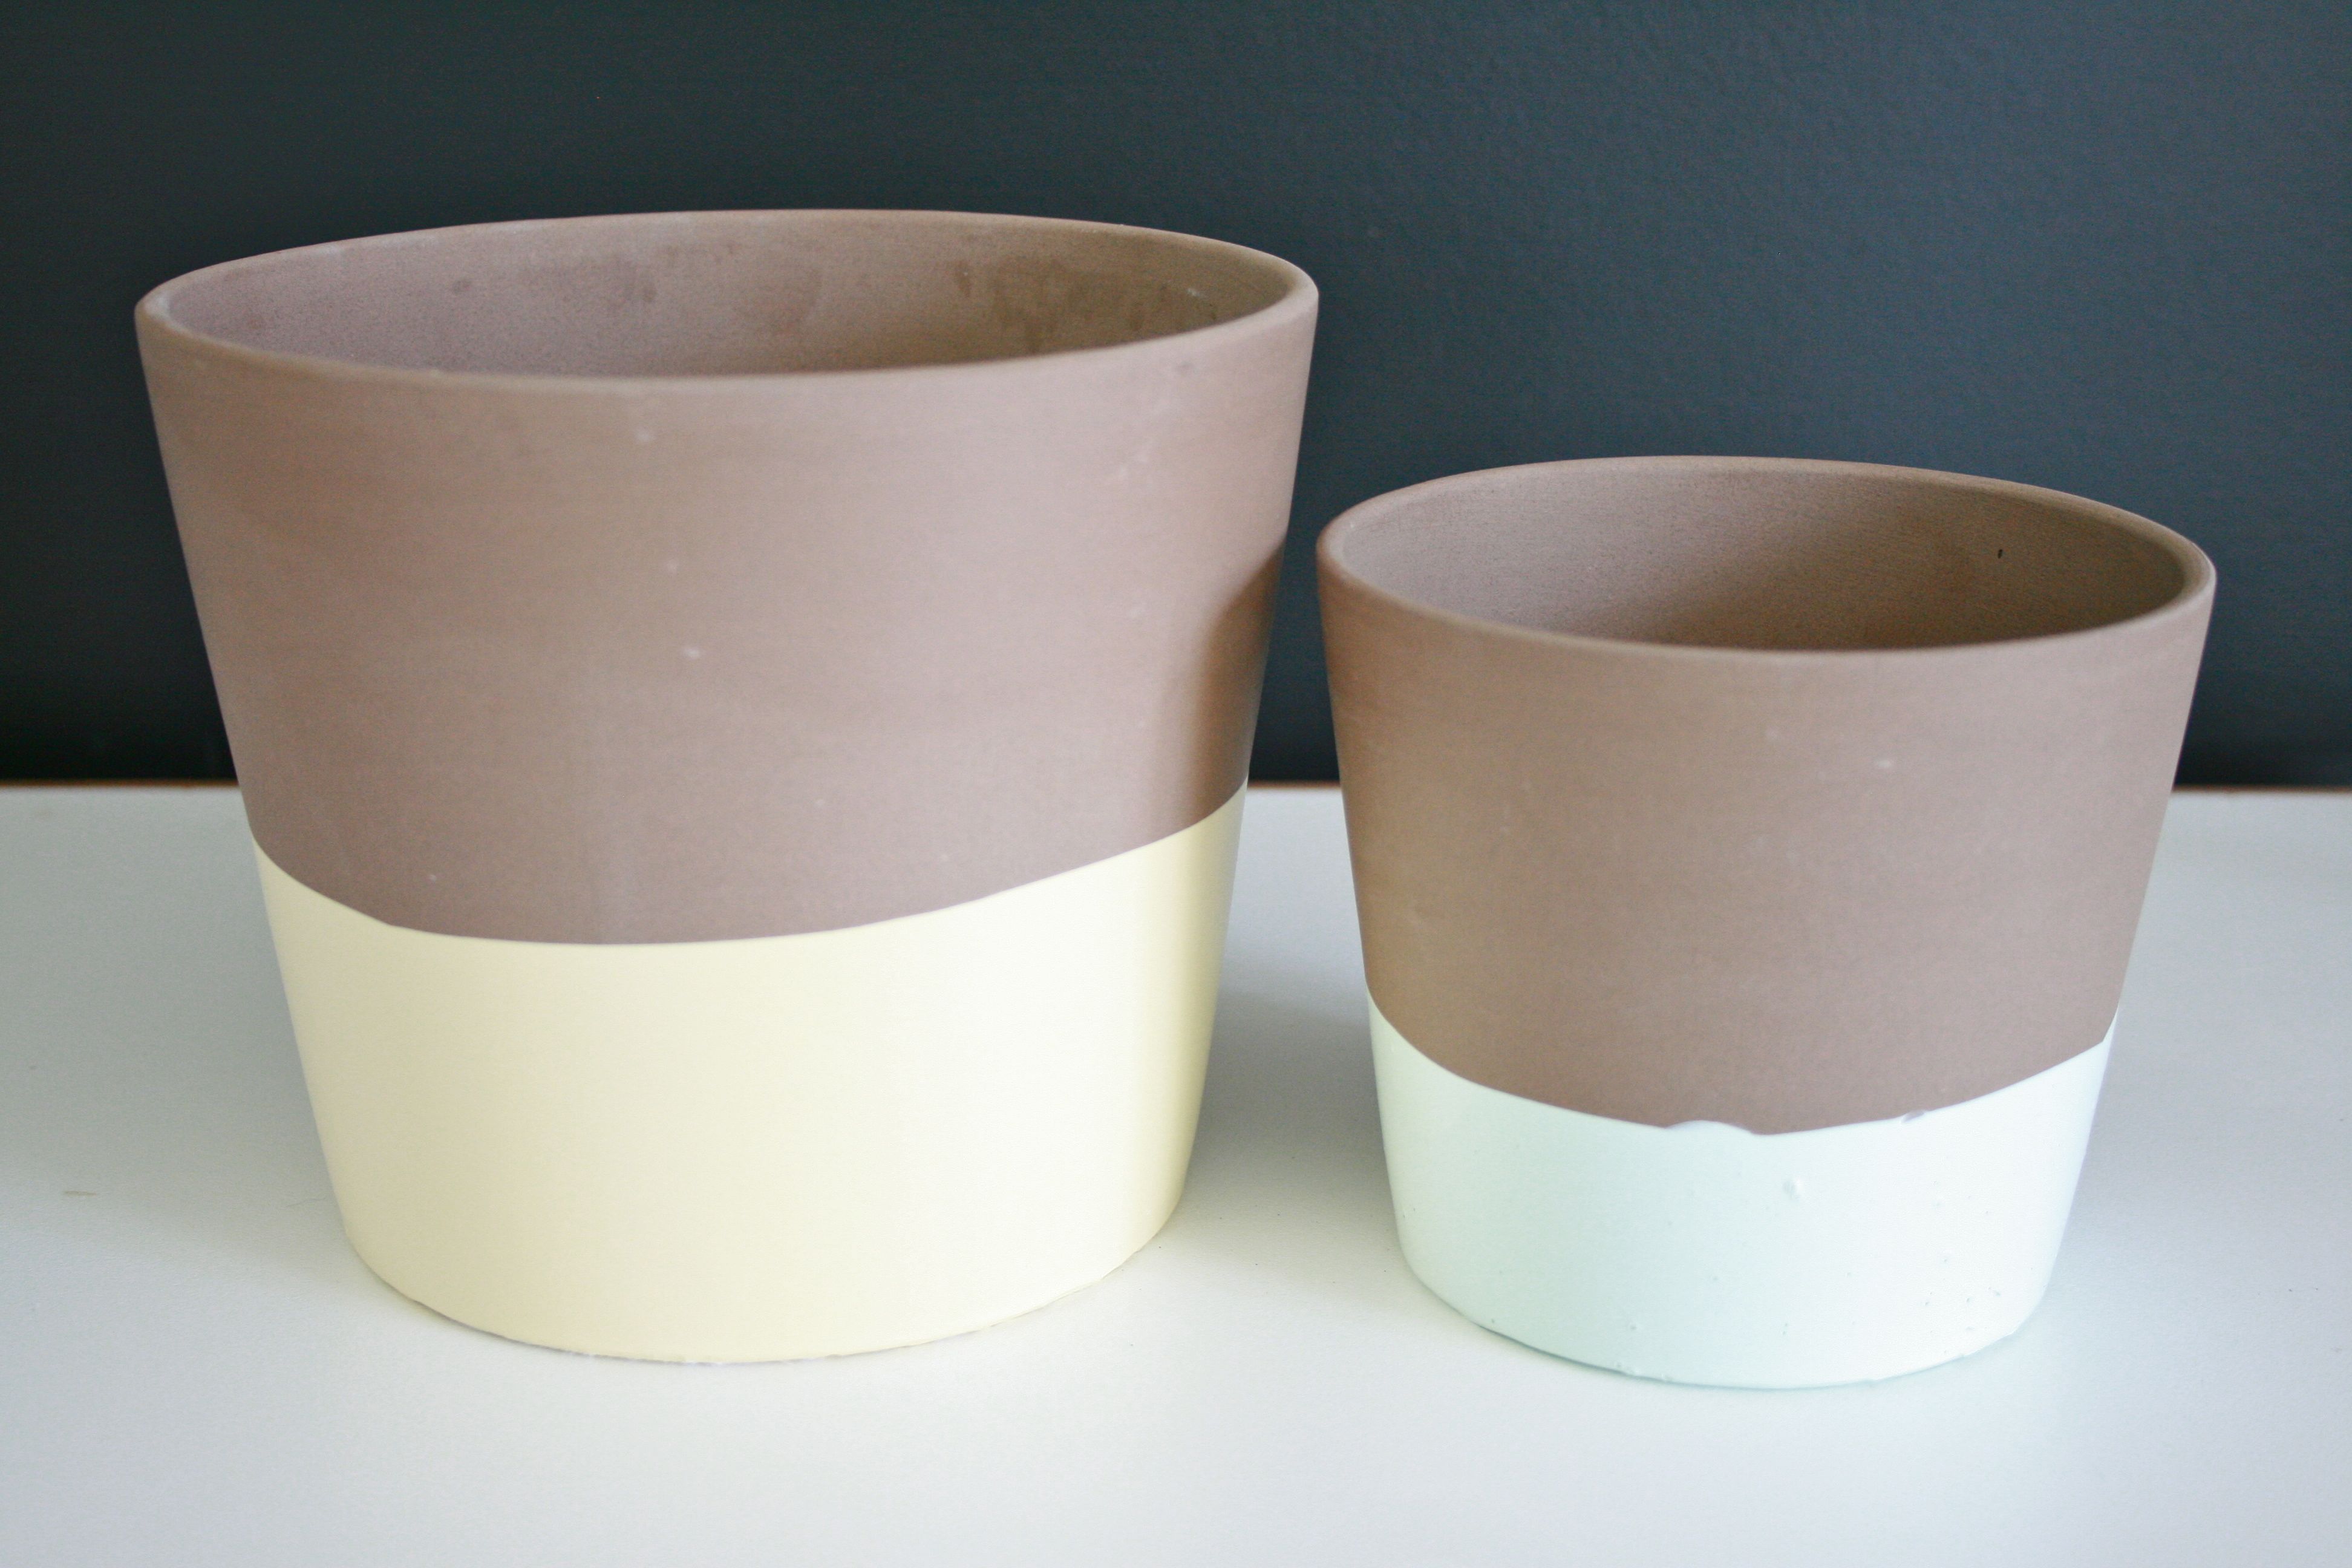
It’s high time I expanded on a quick project that was mentioned in passing a couple of weeks ago…It all started with a trip to IKEA, where I picked up two clay pots – I liked the lines better than the standard wide rimmed garden center terra cotta pots, plus they were cheaper by about fifty cents or so. Sold!

IMG_1769

The reason for this plant based purchase in the midst of winter? Pinterest, of course! I had caught sight of the images below, which feature dipped terra cotta pots planted with succulents, and couldn’t resist. I loved the idea of transforming a fairly bland container using nothing but a straight forward color blocking technique.

4d0746574f7aca4a5984ff332bd95af6

Source | Armelle Blog

6a00d8358081ff69e20168eb0789f6970c-800wi

e508564e90e677b82ee0628a7ec602a8

Source | A Beautiful Mess

Truth be told, this was to be my first experience with dip painting. I had seen so many people tackle the trendy finish, but had never set aside the time to try it myself. Unemployment though gave me the perfect excuse to sit down one afternoon and check this bucket list item off.

First, a bowl of paint. I decided to dip one pot in the minty wall color I used in my studio/office, so I simply stirred up the can and poured a hefty amount into the bowl. I actually ended up pouring what was left of the quart sized can into the bowl, but it still only left me with about an inch of depth (what I didn’t use was poured back into the can at the end of the project).

IMG_2075

IMG_2091

After that first initial pour, I remember gazing down into the tiny puddle of paint tapping my finger nail against the rim of the bowl – It sure didn’t look like enough to me, but I had already begun so into the bowl my clay pot went to settle into the depths. After giving it a moment to soak up some paint and then gently lifting it from the bowl, it really WAS such a minuscule dip – An inch of color did not quite give me the dramatic effect I was going for.

IMG_2097

So I tried a different tactic – I gently tilted the bowl so that the paint pooled into a deeper section and spun the pot slowly around in place to give it more coverage. This allowed the paint to reach far beyond that measly one inch. After that, I lifted the pot out of the paint and sort of stamped it across a piece of scrap paper to remove the access paint.

IMG_2120

IMG_2136

After doing the same thing to the other larger pot (this time with the same light yellow I used on our front door), I put both vessels up on a shelf for a few days to dry completely. Once the paint was set, I took the pair down to investigate my progress. The high quality wall paint was rock solid against the pot walls, but all that stamping left the bottom edges a little ragged…Thankfully, it was nothing a few gentle swipes with a razor blade couldn’t clean up.

IMG_3232

IMG_3235

IMG_3247

IMG_3241

Once that requisite clean up phase was complete, I set my pots back to take a good, hard, critical look at the new dipped finish. LOVED the colors. HATED the uneven dip. In typical fashion, my impatience to get more color left me with a less-than-perfect application.

IMG_3272

Luckily, this tiny little project was HARDLY worth beating myself up over, so I simply smiled, shrugged and added a few extra steps to rectify the situation. My new plan of action was to carefully (CAREFULLY) tape up a new rip around the middle of both pots so that a fresh coat of spray paint would cover up the wobbly line. I first drew two lines going around the middle and then traced them with masking tape to mark the perimeters for my spray paint. Afterwards, I used even more tape and a couple of plastic grocery bags to cover the rest of the pots plus the insides for protection against the spray (not pictured).

IMG_3274

IMG_3291

A couple quick coats of metallic gold paint later and removal of alllllllll that masking tape, and this duo was ready for display. Because it’s still a bit too cold for my succulents to live outdoors, I’m keeping them inside on our bar cart temporarily. I look forward to setting them outside come spring though, where our back deck can benefit from the spiffy new colors and (happily unplanned) gold shine.

IMG_4013

IMG_4022

IMG_4057

Sure, you can still see that waving edge beneath the gold paint, but I actually really LIKE the texture it gives the pots. I think perfection is highly overrated, and ultimately adore my new “dipped” planters.

Have you ever dip painted or dyed anything? I’d love to see your finished product!

A DIY nook desk

It’s the final day of “Office Week”…I’m a bit sad to wave goodbye to this unofficial week-long hash session of one of my favorite spaces in a home, but it’s highly likely that the subject will arise again in no more than a week’s time. I just can’t stop analyzing and dreaming when it comes to a space that has SO much potential for productivity and inventiveness. If you’re a creative like me, an office is where it all happens – Designs unfold, ideas are turned into reality and it’s your own personal inspired corner, both physically and mentally. When I sit down to my own tiny desk, I feel like the world is at my fingertips. Cheesy, but true!

Before I get into today’s post featuring a simple do-it-yourself desk, I just had to share this beautiful, beautiful room. Caitlin Wilson’s gorgeous studio/office space was so aptly featured on The Everygirl yesterday, and I’m fairly certain that I repinned every single photo (taken by the hugely talented Courtney Apple). I’ve never seen a better pairing of colors, motifs and, of course, patterns. Words can’t describe my love for this room. I hope it inspires you too! I’m sharing my favorite photos from the feature here, but do yourself a favor and check out the lovely graphics, copy and interview over on TEG too.

TheEverygirl_CaitlinWilson_10

TheEverygirl_CaitlinWilson_2

TheEverygirl_CaitlinWilson_4

TheEverygirl_CaitlinWilson_3

Part of me regrets sharing that perfect (seriously, perfect) office space because it’s now impossible not to compare it to what I’m about to share with you. I hope you’ll forgive me for not being a professional designer and stylist…

It all began with an empty corner in our finished basement. It’s about four feet wide and three feet deep – Too small for a built-in bar (John’s bachelorhood dream), too awkward for any kind of upholstered furniture and largely felt out-of-place and wasted as it was. Some records up on the wall, a poster and a smattering of papers and pieces of unused furniture were its occupants for far too long. But that’s all history now…

IMG_3358

It was finally time to whip this little corner into shape. The plan? As the title of today’s post reveals, we decided that this would be the perfect place to set up a desk for John. Instead of spending a ton of money on a pre-made desk and struggling to find one that actually fit the nook, we ultimately drew up the plans to build one ourselves using a simple system of supports and precut pieces of wood and melamine. Lucky for us, the snow storm that hit earlier this week was the perfect excuse to stay inside and stain, paint and hammer the afternoon away.

IMG_3298

Before the building phase began though, we needed some wood. We hopped over to Lowe’s and picked up several pieces: 1 1x2x6″ piece (which we had chopped into multiple brace pieces by the nice lumber department guys), 2 1x6x4″ pieces of red oak (to eventually serve as shelving above the desk) and 1 16×48″ piece of white melamine (to act as the desktop). All in all, we ended up spending $41 in lumber, although we only used one of the two oak boards, bringing our final total for the desk down to $29.

The first step was sanding. I used a little piece of handheld sandpaper on the smaller 3 inch brace pieces we had cut, while John went to town on the bigger boards using our hand sander – In case it needs explaining though, the melamine desktop didn’t require any sanding since it’s already sealed with a hard white coating.

IMG_3308

IMG_3317

Once the sanding was out of the way, it was time for painting and staining. We painted all of the tiny brace pieces in the hopes that they would blend into the wall color and disappear. Unfortunately, I wasn’t able to find the EXACT wall color since the previous homeowners didn’t leave it behind, but I was able to find a look-a-like that served our purposes well enough (that multicolored piece in the middle of the photo below is just the stir stick – feel free to ignore it).

IMG_3337

As for the oak boards for the shelves, those got a single coat of Minwax “Dark Walnut” stain to bring out the lovely grain. All I did was brush a liberal amount across the top of the boards with a 2 inch bristle brush, and then wiped it off using an old rag. It only took that single coat to achieve the nice, rich color you see below. We then gave them 24 hours to dry completely.

IMG_3348

IMG_3341

After clearing the area of all the old furniture and paperwork, I got down to business hanging my braces. I placed one long board along the back 29 inches off the floor, which is standard desktop height. After that was screwed into the studs (accounting for the off-center screws in the photo below), I used the same 29 inch height on either side to screw in my side braces.

IMG_3367

Once I made sure all was level, it was simply a matter of sliding the melamine desktop in place. As for the oak shelf to go above the desktop, that went in the exact same way with three braces dispersed along the sides and back of the nook.

Time to style everything up! Since this is technically John’s spot, I had to set aside my perfectionist tendencies and cater to his manly, utilitarian ways. As you can imagine, I’d like to see a little more color, a little more pattern and a lot less cord-age, but he’s over the moon about his new desk space so who am I to complain? If the boy is happy, I’m happy…

IMG_3544

IMG_3560

IMG_3575

IMG_3579

The desk chair used was actually given an early debut via Instagram last week – It came from our favorite estate shop and cost only $12 thanks to a store closing clearance (if you didn’t hear, apparently they AREN’T closing for good – There are plans to reopen under a new name, so I can breathe again…). I really loved the legs and the white vinyl seat. A quick photo texted to John confirmed that he felt the same way, so I slapped a sold sticker on that bad boy (well, really I just took it up to the register and paid for it).

IMG_3476

IMG_3486

IMG_3492

It’s functional, it’s a place where my sweet hubby can be inspired by cars, music and fly fishing and I’m happy that we were able to make use of once wasted space. Have you ever built your own desk out of a few pieces of lumber and a handful of screws? Or maybe you would have done something different with this unique cut out. Inspire us in the comments section with your thoughts and ideas!

Untitled-1

Have a great weekend, everyone.

P.S. Don’t forget to enter my “Office Week” giveaway! Two lucky readers will win pieces from See Jane Work and The Green Daisy. Click here for the details, and good luck!

getsocial
have yousubscribed?
Everybody's doin' it.